Installation, Testing and Comparison Continued
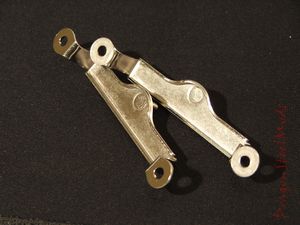
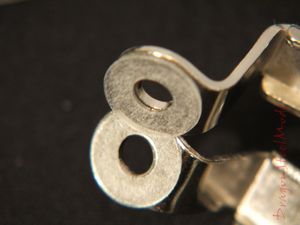
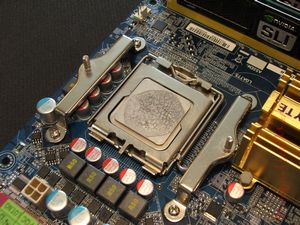
Continuing where we left off with the installation process according to the manual, the next part would be to install the mounting brackets and backplate. The first thing you’ll need to do is attach the sticky insulating washers to the bottoms of the brackets.
Next step would be to attach the backplate to the mounting brackets with the four supplied screws, I encountered no clearance issues with the brackets on the motherboard I was using. Then of course you’ll need to apply the thermal compound. (I like the idea of the sticky washers, I personally use super glue to attach them to the brackets, it makes life much easier during the installation process, it’s nice to see Noctua paying attention to these little details…)
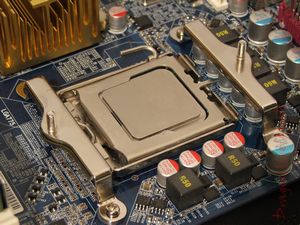
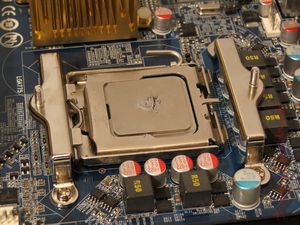
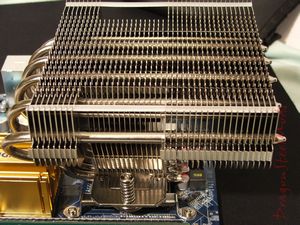
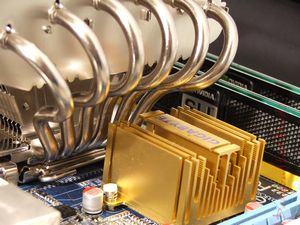
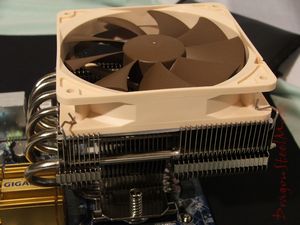
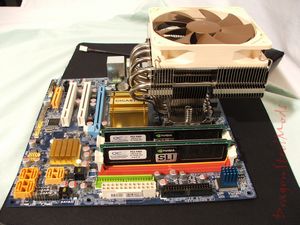
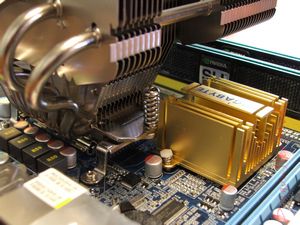
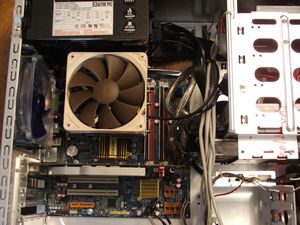
Now we can finally install the NH-C12P, and then of course you would install the vibration dampening strips and finally the fan. According to recommendations from Noctua, the NH-C12P should be mounted with the heatpipes facing downward in a tower style case, so that’s how I’ve got it installed now. I ran into no compatibility issues with the cooler and the board, something that surprised me as the North Bridge heatsink is very large and causes compatibility problems with many CPU coolers.
Now it’s time to put everything back in my case… ooh-ohh, it doesn’t fit, the NH-C12P sticks out too far over the edge of my motherboard and hits the power supply so I can’t fasten the motherboard in my case.
Honestly I was worried about that problem when I was looking at it originally, but not a big deal really, the NH-C12P can be rotated for better compatibility, but that involves me remounting the brackets as well…
This isn’t something that will effect everyone though, only on cases where the PSU is close to the CPU socket, it will all depend on your system configuration.
Installation, Testing and Comparison Continued:
Well onto remounting the brackets, this of course involves taking everything apart and putting the brackets in a different place.
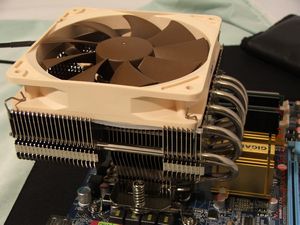
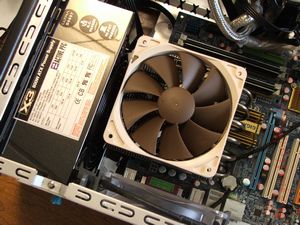
This is a good thing though, because I found that when I mounted the NH-C12P this way I didn’t run into any installation problems here either. So having to mount it both ways just goes to show that it is very compatible with different configurations. I mounted it with the curve of the heatpipes closest to the exhaust fan figuring the hottest part should be closest to the fan… makes sense to me anyway…
Here is everything installed back in my case, no clearance issues here either, with the exception of getting the fan attached to the cooler, it was a bit tight getting my fingers between the cooler and PSU, but with work I got it attached.
Now we can get to the real reason you’re reading this review, the testing section, let’s see just how well this new cooler performs.
For all testing I use Orthos Stress Prime to put load on the CPU, and I use Coretemp to record and log the temperatures, once testing is complete I average the temperatures out and that is what you see in the charts.
For testing using the C2D I only use one instance of Orthos Stress Prime, but for Quad Core testing I use two instances with affinity set to the separate CPU cores to insure 100% load. This was done for several hours a day over several days then averaged out.
Ambient room temperature during all testing was 19C (+/- .3C)
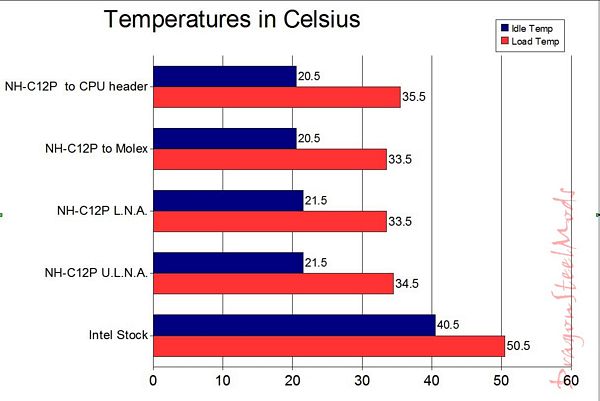
The first set of testing is using my C2D6420 and the included NT-H1 compound and the included U.L.N.A and L.N.A. Fan speed adapters. The results included are for having the fan connected to the CPU header, to the Molex via an adapter and using the two Low Noise adapters.
That gives us a general idea of temperatures, but not much of a real comparison, we already knew the C12P would be better than the Intel Stock Cooler.
So, now we’ve got a massive chart with many CPU coolers in it for comparison. Testing is the same, with the same ambient temperature but the difference is that I used Arctic Cooling MX-2 Thermal Compound for this set of tests as that is what I used for all of the other CPU Coolers in the chart.
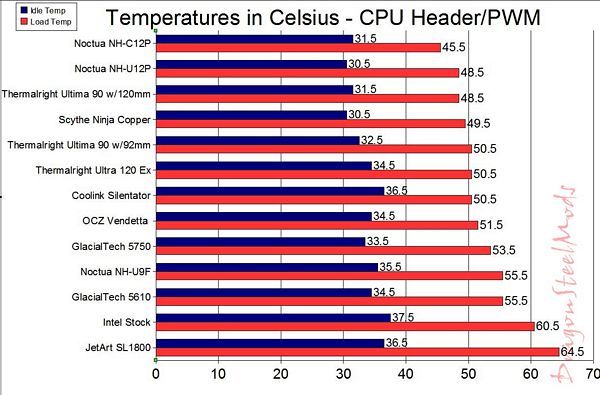
Here’s the results with the C2D6420 with fan connected to CPU Header:
(you can click for a larger view to open in a new window)
We can see the C12P is beaten by the TRUE, which isn’t at all surprising, but still very good performance.
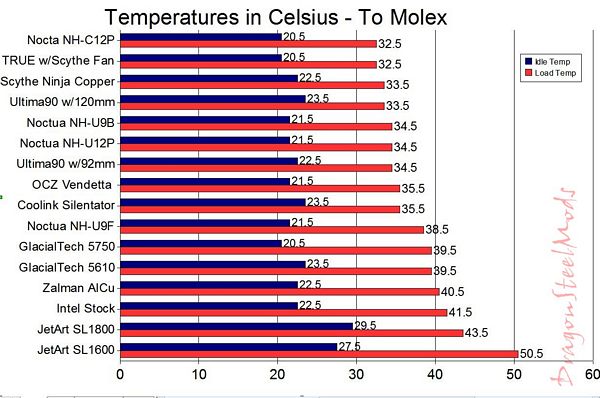
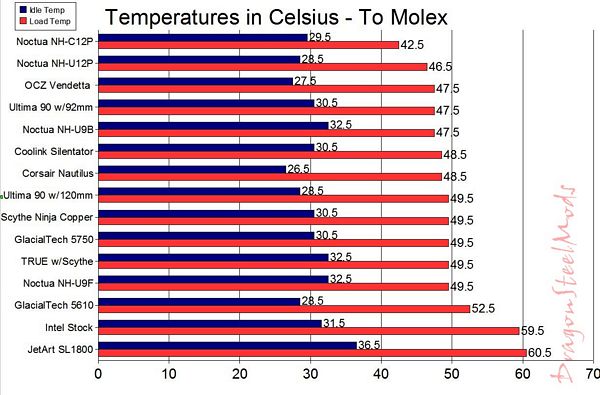
Here are results of testing with the fan running at full or connected to a Molex:
With the fan running at full speed we see the TRUE and the Noctua are tied for first place, a little bit of airflow goes a long way…
and finally to end the testing with the C2D CPU, here are the results using no fan at all:
A bit high on the idle temps compared to the others but still very respectable, you can easily run your system with no fan and be very safe.
Now for the testing on the C2Q6600, first is fan connected to the CPU header:
(you can click for a larger view to open in a new window)
Very nice results here from the C12P and a bit shocking, I re-ran these tests over and over and came up with the same results just to be sure of them.
Here is with the fan connected to the Molex or running at full speed on the Q6600:
A very surprising drop in temperatures, four degrees less than the closest competitor…
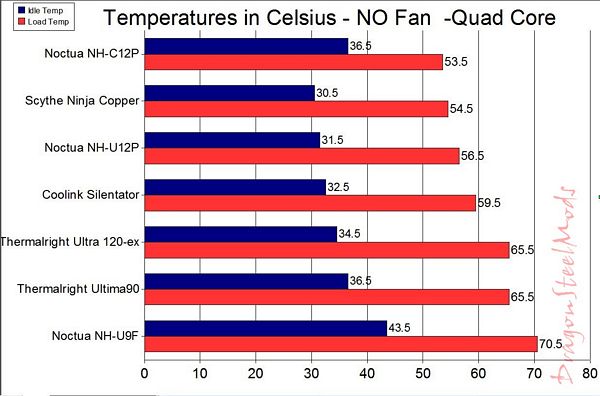
and finally testing on the Q6600 with no fan:
well we can see the NH-C12P dominates the quad core CPU coolers in all testing…


