Installation, Testing and Comparison
So let’s get to the installation, but before that I should give you my basic system specs.
Motherboard: Asus P8Z68-V Pro/Gen3
CPU: Intel Core i7 2600K
Video Card: HIS Radeon HD 7850
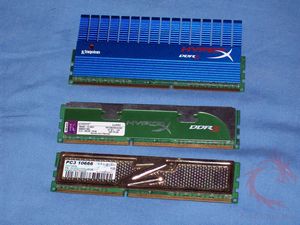
Ram: 12gb mixed OCZ Gold and Kingston HyperX
Case: NZXT Switch 810
I should mention that I have six Noctua case fans installed for cooling. Two on top, one in the rear, two in the front and then one inside mounted on a hard drive cage pointing upwards at a slight angle toward the video card and CPU.
There is some preparation you’ll need to do before you get to the actual installation.
The first thing I did was install the silicone vibration strips to the cooler itself, two on top and two on the bottom. It’s very simple, just stick them on and you’re done.
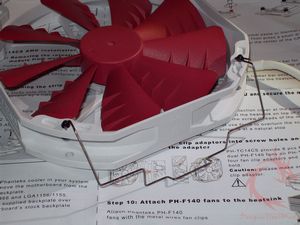
The next thing I did was prepare the fans and this involves the four fan adapters per fan and two clips for each. You push the black adapter up through the holes in the fan and then slide the clips through the part sticking up. In the picture below it’s the configuration for the top fan with the clips facing downward, it’s opposite for the bottom fan as the clips need to face upwards.
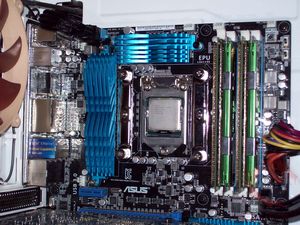
Ok, my motherboard is very crowded around the CPU socket area with heatsinks so installation was very limited for me. With the ram you’ve got three sides with something there essentially.
Once I figured out that only one orientation would work for me I installed the mounting brackets which involve the backplate, four plastic spaces, four tall screws, two brackets and the four thumbscrews that hold everything in place.
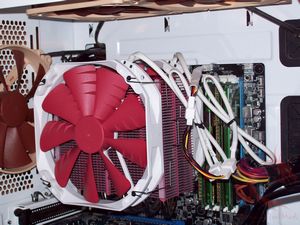
I could only install the cooler in one way and that’s with the heatpipes facing towards my video card or down.
I should mention that the instructions say you should remove the motherboard from the case for installation; I ignored this as most coolers tell you to do that. Most motherboard trays today feature cut-outs in them to aid in installing CPU coolers so you don’t have to remove the motherboard from the case and Switch 810 does. I found that there’s a reason it says to remove the mobo from the case, you pretty much have to, if not it’s very difficult to install the cooler while the mobo is in the case. You use the included wrench to secure the cool, it’s ‘L’ shaped and you turn it with the long end going over your ram. There’s a single screw on each side of the cooler base so you have to repeat for both. The right side wasn’t too bad but the left side was hard and took a lot of time to get tightened while in the case.
So it takes time and patience to install the cooler while the mobo is in the case but it can be done. Yes it would be much easier if the motherboard was out of the case but the time it would take to remove it and reinstall it is probably about the same as it took to just install the cooler while in the case. I think it’s just a very large hassle having to unhook all the cables inside and out and remove any cards you’re using. Bottom Line is that the Phanteks cooler can be installed while the motherboard is in the case but you just need a lot of patience to do it.
Once the cooler is installed you just clip the fans in place, there’s plenty of room under the cooler to do this easily. Doing it while it’s in the case is a bit more difficult depending on how much room you have in the case.
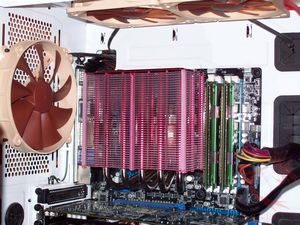
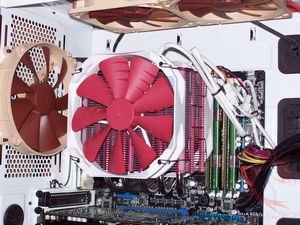
Here are two pictures of the cooler fully installed. The first one is just using the ‘Y’ connection for both fans connected to one fan header and then the second picture is with the low noise adapter installed as well. I ran tests both ways which you’ll see shortly.
If you noticed in the pictures, the ram I’m using is small in size so I had no clearance problems. I removed the bottom fan for testing and saw a lot of room there and I installed a set of Kingston HyperX with the T1 tall heat spreaders on it and it fit just fine. So yes you can use large style ram with this cooler but you can only use one fan while doing so.
I tested this cooler in several different configurations:
-With two fans
-With two fans and the low noise adapter
-With one fan on the top
-With one fan on the bottom
-With no fans
-With the CPU overclocked
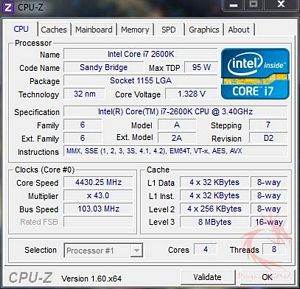
My Core i7 2600K runs stock at 3.40 GHz and I easily overclocked it up to 4.43 GHz. That’s a decent increase I think.
During testing the ambient room temperature was 24C (+/- .3C). To get 100% load on my CPU I used four instances of Orthos Stress Prime and used CoreTemp to monitor and record the temperatures. I then averaged them out to get a single temperature for the charts below.
You have to remember one thing, running 100% load on a quad core CPU isn’t something most people will be doing at all most likely. No matter what I’m doing I don’t think I’ve ever ran my CPU at full 100% load under normal usage conditions. It’s the extreme end of things, pushing the CPU to the limit as it were, but it’s a good way to test the ability of the CPU cooler.
The first chart I have for you is just the Phanteks cooler with all the different configurations and the Intel Stock cooler that came with my Core i7 2600K.
Take a look at the top two results for 2 fans and 1 fan on the top, they’re very close. I mention this because of what I mentioned earlier and being able to use larger ram with this cooler. So you can use your large style ram and not have much of a difference in the cooling ability of the cooler.
The cooler performs very well overall especially without any fans at all; load temp is lower than I expected.
Overclocking the CPU we see a rise in temperatures as expected, but the results are well within the tolerances for the CPU so we’re running safe.
When both fans are running without the low noise adapter they are audible in the case, but not overly so, just a light hum but you can definitely hear them. Using the low noise adapter does lower the noise level of the fans to virtually silent or it just blends in with the rest of the case fans humming. Using the low noise adapter slows the fans down but it doesn’t affect the performance of the cooler really, only a couple degrees higher which is worth it for the lower noise levels I think.
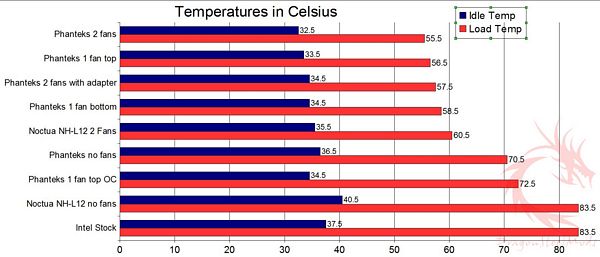
To finish this review up I’ve got one last chart for you where I added the Noctua NH-L12 that I recently reviewed. The NH-L12 isn’t made for
overclocking at all; it’s small and made to be used in tight spaces essentially. I included the results for the NH-L12 using two fans and then using no fans just because I was curious really.
As you can see the Phanteks outperforms the Noctua cooler, but that was to be expected really as the Noctua is smaller and not meant for overclocking.


